How to create a Pool Test?
Steps to create a Pool Test:
Step 1: Create Test

- Log in to your Think Exam panel and navigate to the "Test Manager" tab. Click on "Test" and then on "Add" to create a new test.
- Enter the test details, such as name, duration, instructions, and other relevant information.
- Scroll down and select the "Pool" option for creating a pool test then click on "Next"
Step 2: Configure the Test Settings
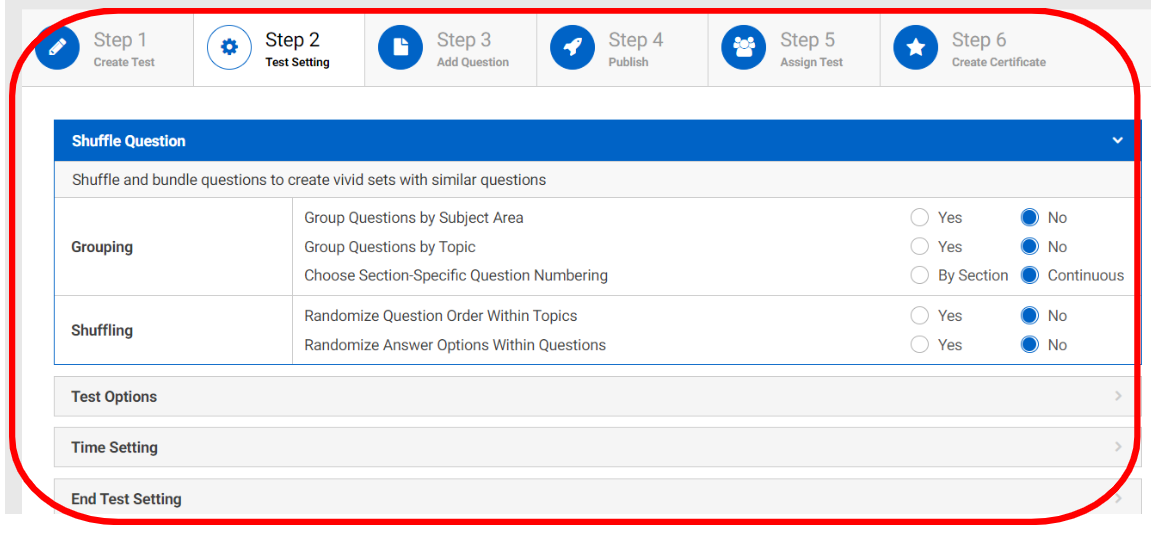
- Set up the test according to your requirements by enabling the test settings such as Grouping, Test options etc. You can refer to this article to understand what each test setting means
Note : Shuffling settings are not applicable in a pool test as the system automatically selects random questions.
Step 3 : Add Questions to the Test

- Select the "Question pool" option to add questions to your test from the question bank or choose the "Import" option to import question through Excel.
- Decide the number of questions to include in the test from the pool. You can include all available questions or a specific number based on your requirement.
- Choose from the dropdown whether you want to manually or automatically add questions to the test
- Manual: Click on "Manual" to select questions manually.
- Automatic: Click on "Automatic" to let the system select the questions.
- Click on "Add Questions"
- Click on "Back to Test" to and then on "Next" to continue.
Step 4: Publish
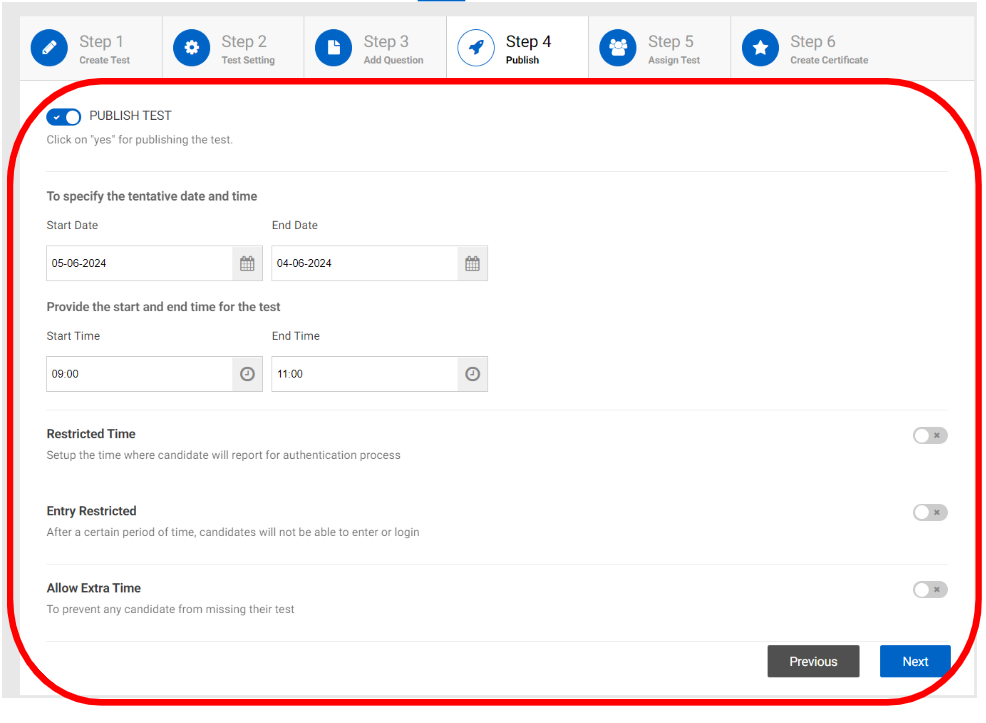
- Specify the start and end date as well as the login time for the test.
- Publish the test once these details are set.
- Click on the "Next" button to procced further.
Step 5: Assign Test
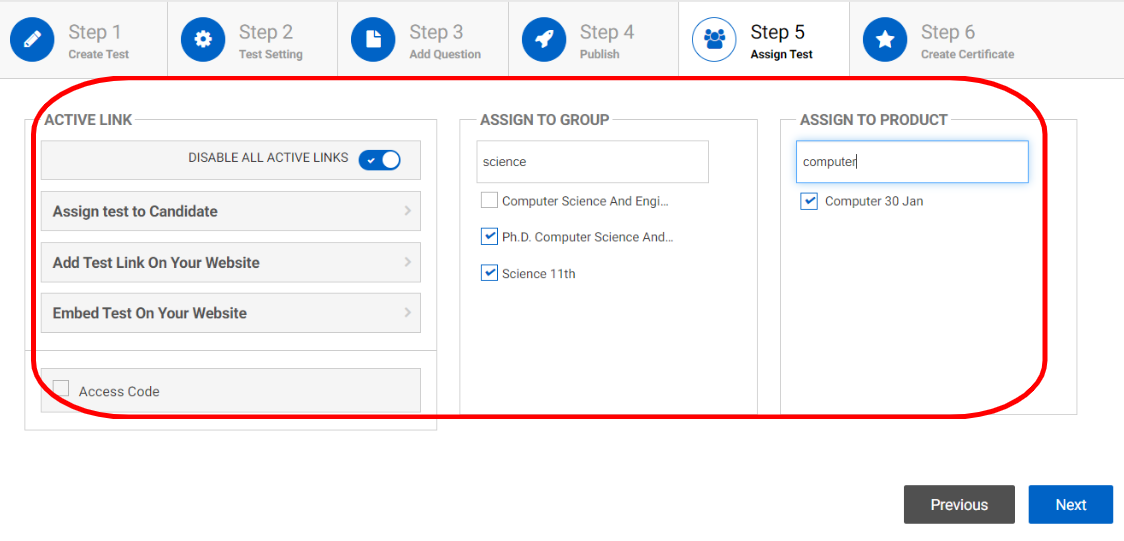
- You can choose the "Active links" option to import candidates and share the test link directly or you can assign the test to a group or a product.
Step 6: Certificates
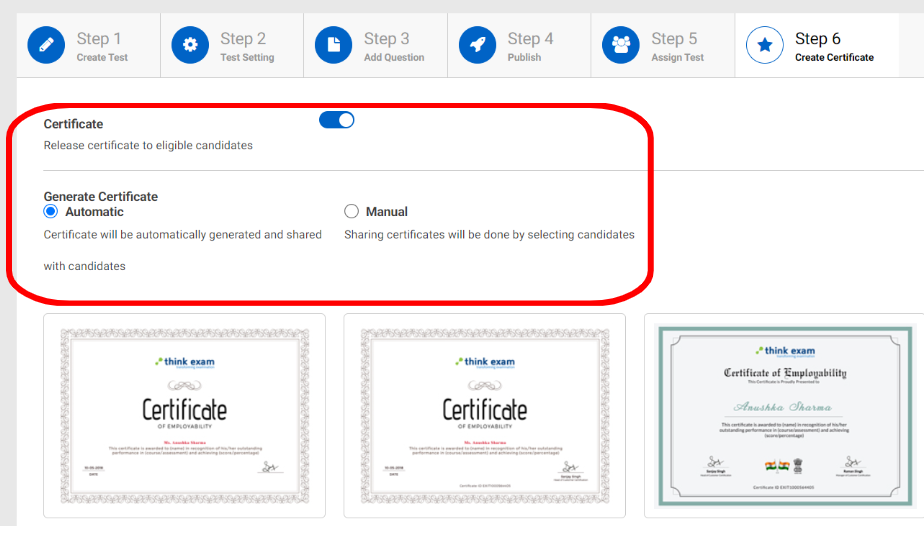
- You can enable this option to share certificates with eligible candidates. You can select the manual or automatic option and then select the certificate template and customize as per your preference.