How to create a product?
Overview:
The Product feature on Think Exam functions as a digital learning resource. It allows admins to develop both courses and test series, providing candidates with organized educational materials and assessments to enhance their learning process and evaluate their understanding of the subject matter. Creating a product involves defining elements such as product description, pricing, content selection, and more.
To create a course, follow these steps:
Step 1: Create a product
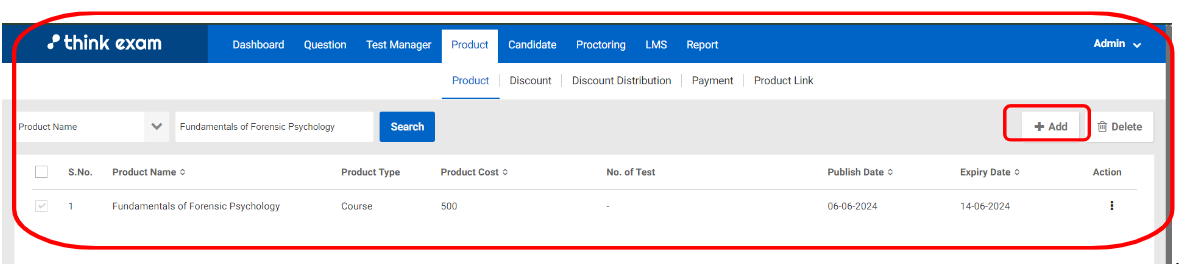
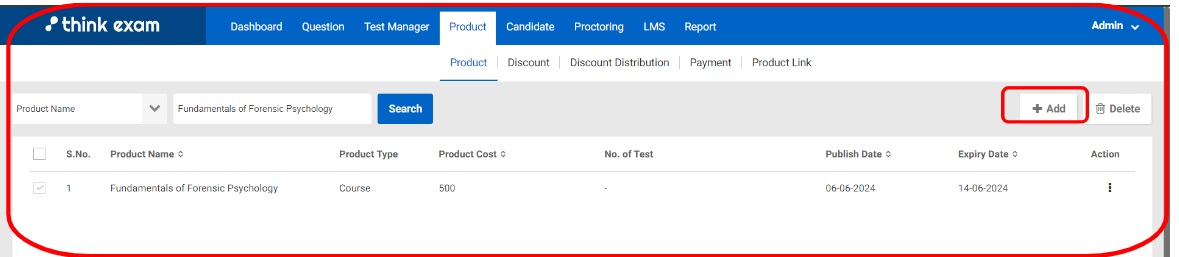
- Click on the "Product" tab and then click on "Add."
- Add the product name, select group and product type.
- Language: Select the course language.
- Course restriction: This setting refers to how the course content should be accessed on which device. You can select the relevant option from the drop-down.
- Course Level: Choose the difficulty level of the course.
- Sample course: This setting refers to whether this course is a sample course or not. Select the relevant option from the dropdown.
- PDF downloadable: If your course contains PDFs, choose the "Yes" option if you want your candidates to download these PDFs.
- Learning Path: Enabling this option lets the candidates view the next video after completing one.
- Product description: Add the product description.
- Image: Select an image to associate with the product. You can choose an image from the library or upload your own image.
- Does the registration process require payments? Select the "Yes" option if you require candidates to purchase the product while registering.
- Click on "Next."
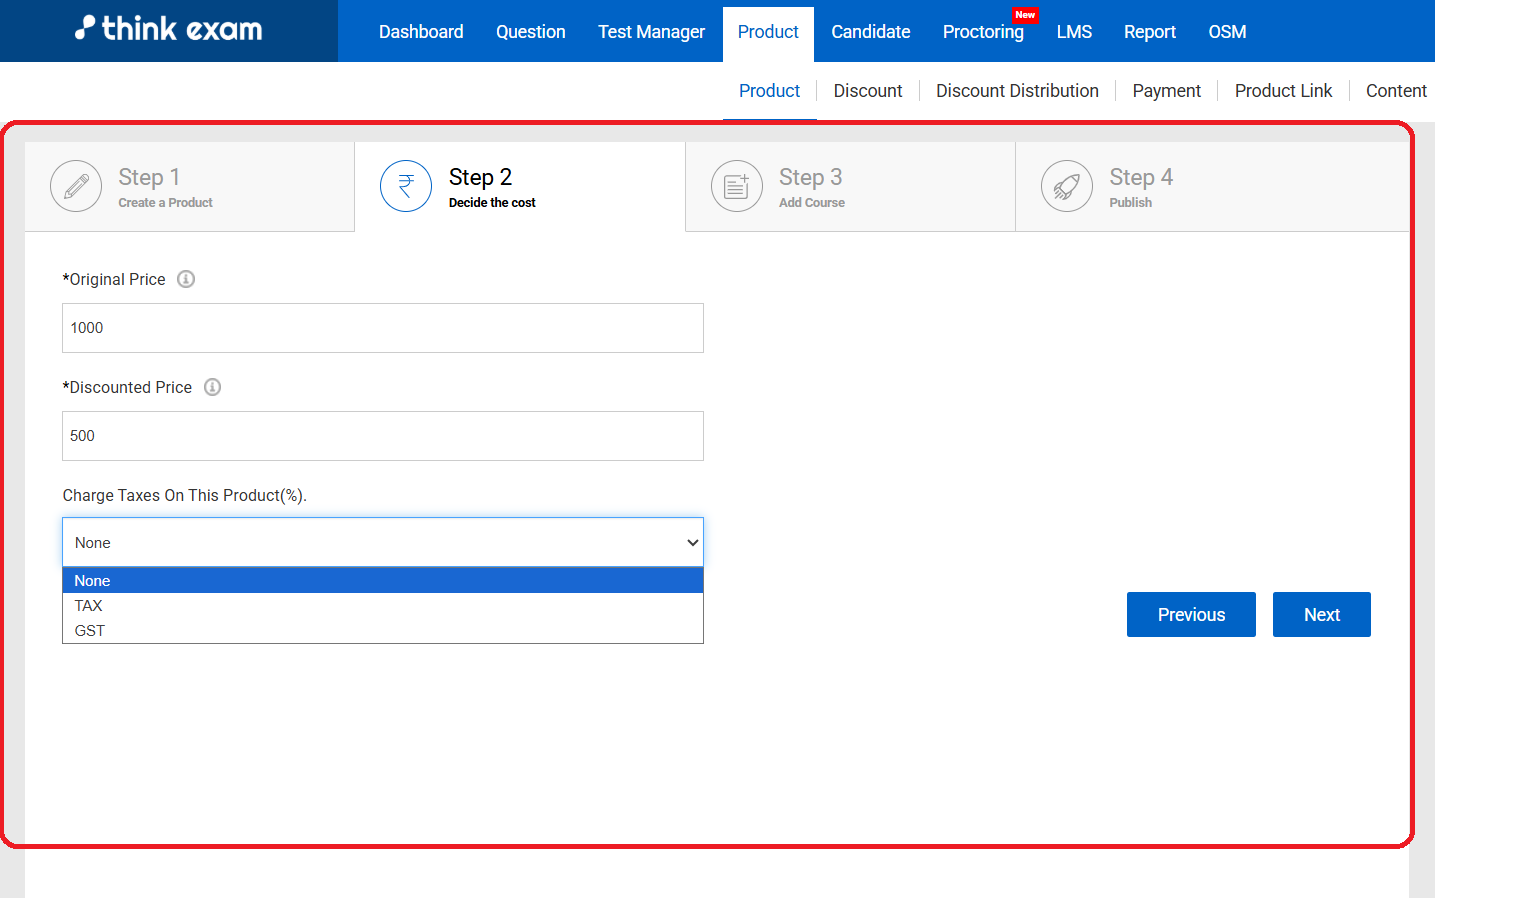
Step 2: Decide the cost

- Original Price: Mention the original price of the product.
- Discounted price: Mention the price after the discount.
- Charge Taxes on This Product (%): Use this option to apply additional tax charges to the product. You can choose either Tax or GST, specify the applicable percentage, and the selected tax will be added to the product price accordingly.
- Click on "Next."
Step 3: Add course
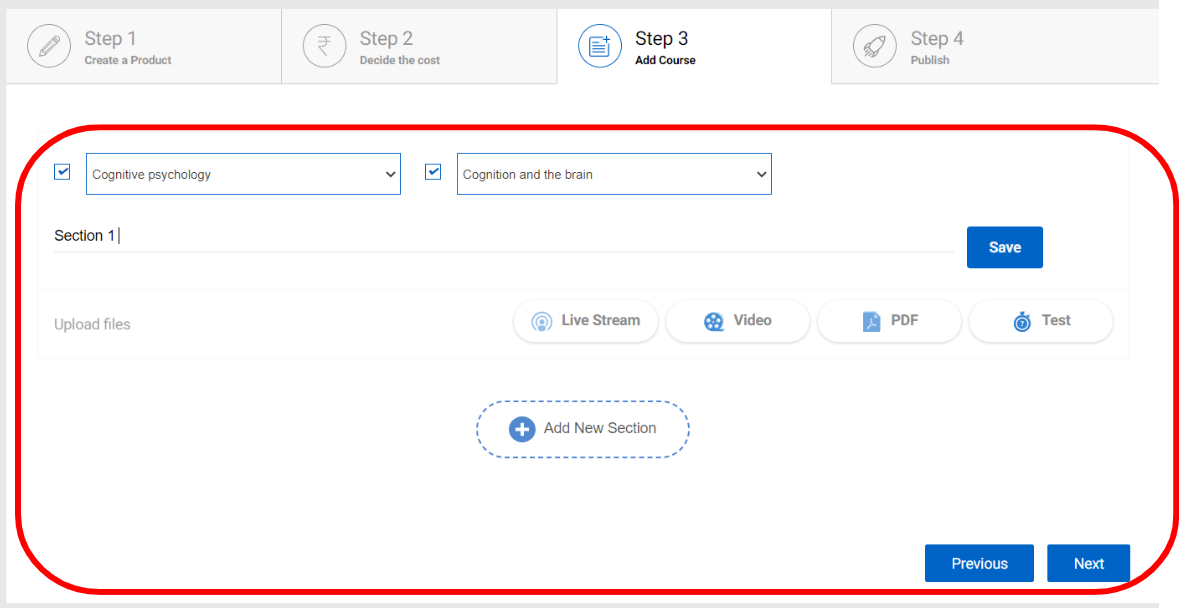
- Click on the checkbox and select the subject; similarly, select the topic.
- Section Name: Give your section a name and then click on the save button. You can add multiple sections by clicking on "Add new section."
- Uploading files: Select the files or tests you want to add to the course, then click on save.
- Click on "Next."
Step 4: Publish
- Publish: Enable this option to publish your product.
- Mention the Start date and the Expiry date of this course. Candidates can purchase this course within the stipulated time.
- Click on "Finish."
To create a test series, follow these steps:
Step 1: Create Product
- Click on the "Product" tab and then click on "Add."
- Add the product name, select group and product type - Test Series
- Product description: Add the product description.
- Image: Select an image to associate with the product. You can choose an image from the library or upload your own.
- Does the registration process require payments? Select the "Yes" option if you require candidates to purchase the product while registering.
- Click on "Next."
Step 2: Decide the Cost
- Original Price: Mention the original price of the product.
- Discounted price: Mention the price after discount.
Charge taxes on this product(%) :- If you want add additional charges on the product then you may add we have two options here TAX, GST. Select any of them and apply it accordingly.
- Click on "Next."
Step 3: Add Test
- Select the test category from the dropdown.
- Drag and drop the tests to the box on the right side to add these tests to your test series.
- Click on "Next."
Step 4: Publish
- Publish: Enable this option to publish your product.
- Mention the Start date and the Expiry date of this course. Candidates can purchase this course within the stipulated time.
- Click on "Finish."
Note: By clicking on the three dots, you can edit/delete and associate candidates to the product. The "Associate candidate" option can be used when you have collected the payment for the product outside Think Exam.
Refer to this article to enable the payment gateway to receive payments from your candidates for all purchased products.
Related Articles
How can I create a new product?
To create a product, kindly navigate to the Product tab, click on add button. Enter the details in each column at every step, and then click on the 'Save' button.How can I create a new link for the product?
To create a new link for the product, follow these steps: Navigate to the Product Link section in the Product Tab. Click on the Add button. Enter the required information. Click on the Save button.Creating a Product Link
We can generate a product link and share it with the candidates, allowing them to access the product directly and complete the payment to purchase it. To generate the product link go to product section then product link the click on Add button as ...How to Upload Content in Product?
To upload content in the Product module, follow the steps below: Step 1: Navigate to the Product module and click on Content. Create the desired content by clicking on Add button before linking it to any product. Once the Content has been created, ...How to create a Pool Test?
Steps to create a Pool Test: Step 1: Create Test Log in to your Think Exam panel and navigate to the "Test Manager" tab. Click on "Test" and then on "Add" to create a new test. Enter the test details, such as name, duration, instructions, and other ...