How to create and assign groups
Overview
For library-based panels, tests are directly added to groups. You can create either a multi-test group or a single-test group with individual or group validity:
- Multi-Test:
This option allows you to add multiple tests to a group that candidates can attempt.
- Single-Test:
Choose this option if you want to add only one test to the group.
Validity Types:
- Individual Validity:
This specifies the time each candidate has to complete the test. For example, if the individual validity is set to 72 hours, each candidate will have 72 hours from the moment they start the test to complete it.
- Group Validity:
This defines the validity period for the group. You can set a specific date range and time. For example, if the start date is 30th July and the end date is 8th August, candidates can attempt and access the test any time between these dates.
Steps to create a Group and add tests
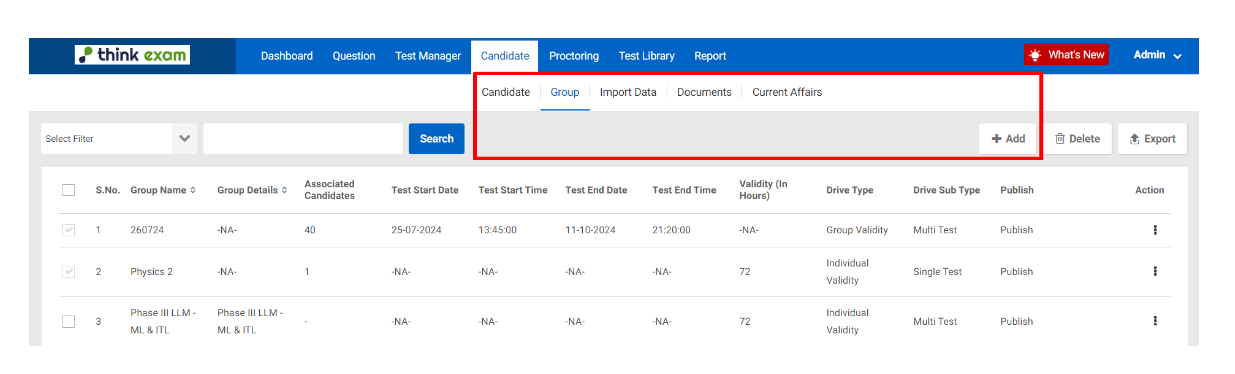
1. Navigate to the "Candidates" tab and click on "Group."
2. Click the "ADD" button.
3. Enter the group name.
4. Choose either individual or group validity as per your requirement.
5. Select "Multi-Test" or "Single-Test" and choose the test(s) you want the candidates to attempt from the drop-down menu (Only published tests would be visible in the drop-down).
- For individual validity, specify the validity period in hours.
- For group validity, select the date range (start and end date) and time (start and end time).
6. Choose the invitation email template from the drop-down menu (this step is mandatory). You can enable reminders for upcoming and incomplete tests to notify candidates (this is optional).
7. Click "Save" to apply your settings.
Steps to assign group to candidates:
After creating a group, you may assign the test via group link or add candidates directly in that group.
1. Assigning a test to candidates via group link: With this option you can directly share the group link with the candidates. This option is available only for groups with group validity enabled.
To assign tests via a group link follow the steps below
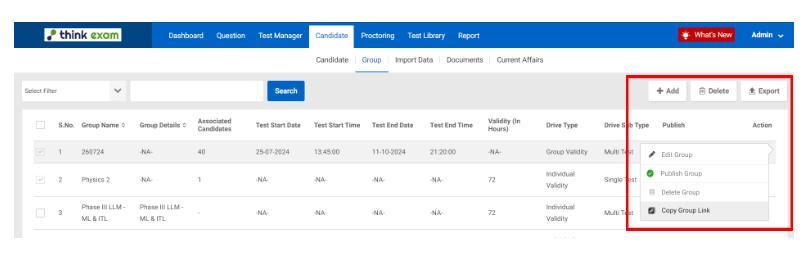
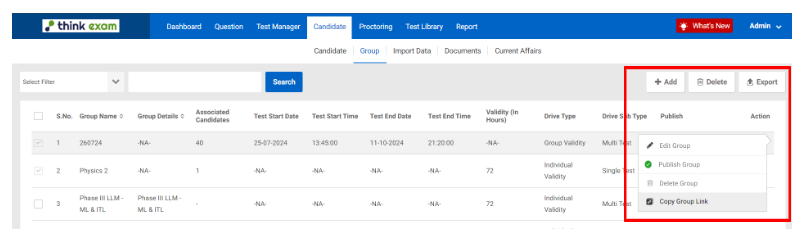
- Navigate to the candidate tab and click on group
- Click on the three dots against the group
- Copy the group link and share this link with your candidates internally
Please note : The candidates will click on the group link and then register themselves and enter their details such as password, ID & name
2. Assigning a test to candidates via test link: With this option you can directly share the test link with the candidates.
To assign tests via test link follow the steps below
- Navigate to the Test Manager tab and select Test.
- Click on the three dots next to the test.
- Copy the test link and share it with the candidates internally.
Please note : The candidates will click on the test link and then register themselves and enter their details such as password, ID & name
3. Add candidates in the created group: In this option you can import candidate data and add them to a specific group.
To import candidates, follow these steps
- Navigate to the “ candidate” tab and then click on “ Import data”
- Now, click on the “Import” button given on the right side of the screen.
- Click on the blue “ sample file” button to download a sample excel file.
- Open the Excel sample file to add you candidates data.
(The sample file shows in which format the candidate details need to be added. Replace this dummy data with actual candidate details. The fields marked in red are mandatory and must be filled in, while the yellow fields are optional. Please ensure that you fill in all mandatory fields and save the file.)
- Navigate back to the Think Exam Panel and Upload the edited candidate file,
- Scroll down and click on Import data. You must check the “send email” box to send login details to the candidates via email.
- After you have uploaded the file, check if the file was uploaded successfully, if not download the error file by clicking on “read, Inserted” against the uploaded file. Rectify the issues in your original candidate file as per the error file and then re upload the file.
Please note: Enabling Send Email before importing the candidate data is mandatory. If you want to edit any details of the candidate, you can click on the pencil icon.
4. Send or resend emails to candidates
Follow these steps to send / resend emails

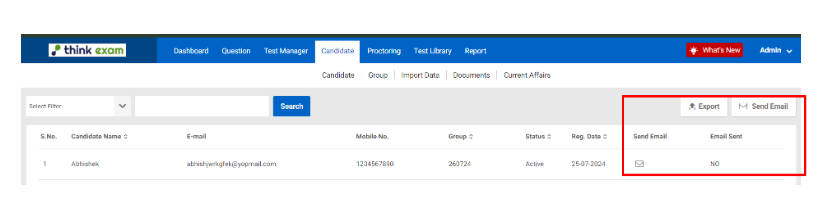
- Navigate to the Candidate tab and select Group.
- Click on the number of associated candidates in the group.
- To send an email to all candidates, click the Send Email button next to Export.
- To send emails individually, click the envelope icon next to each candidate's name.